This post is a non-technical 'one-year-on' review of sorts, and is essentially a follow-up to this post.
Our colleagues over in America have a phrase they use to describe any technique or item of kit which is the mainstay of their work; something which is used time and time again - dependable, reliable, guaranteed to get the results they require. The phrase? 'Go-to'.
For all the high-tech 'bells-and-whistles' kit we use on a regular basis here at GBP, I would have to say that my go-to item has come to be the trusty Canon Powershot G9 point-and-shoot camera.
Having used it regularly for just over a year now, I can honestly say it truly is an indispensable tool on a great many assignments. Whether to capture behind-the-scenes snaps and reference shots at a recce, or to film events in real time, this little machine has come up trumps more times than I can remember. Quiet, subtle, unobtrusive - it is small enough to slip easily into a jacket pocket, yet powerful enough to deliver. Clearly a rugged shell of a body, it has done remarkably well in all conditions from rain-soaked moorland to sun-baked car forecourts; even when it suffered a 4-foot drop onto the pavement recently, all that was required was a simple lens realignment - surely testament to its build quality.
The 12.1 megapixels offered is more than enough for our requirements (you already know my thoughts about the issue of resolution). The resulting images have frequently matched the quality produced by the Nikon SLR cameras - to the point where the G9 always accompanies me as a back-up camera, just in case all the SLRs should pack up mid-shoot. With so much manual override available, including two user-defined Custom settings, this camera has proven itself to be just as versatile as the big boys.
When it comes to video, the 640x480 'standard' video quality setting is more than adequate for use here on the GBP Blog; and the time-lapse function (user-defined between capturing one frame every one or two seconds) produces highly effective results. Time-lapse is a great way to capture the events of a shoot from set-up to completion and thanks to silent operation, clients are more comfortable with the G9 in the corner of the room than a regular video camera; they even comment that they'd forgotten it was even there.
My only real gripe concerns ISO/noise levels - specifically, that when you set the G9 to ISO 400 or above, the 'grain' within images is often clearly visible, whereas it is not at the lower sensitivities. This, of course, is not such an issue most of the time, as I very rarely go above 200. And what's more, for web use (for example behind-the-scenes stuff), one can often get away with a slightly lower quality image if the output is, say 400x300 pixels.
Of course, as is so often the case with manufacturers these days, Canon has superceded this model with the Powershot G10 which, as you can imagine has 'a better this, a faster that' and so on. Before you ask - no, I'm not going to rush out and buy one; it's predecessor is still more than capable of doing everything I could ask from it, and I therefore have no need to change it.
Would I recommend this camera? Definitely. And with it now being 'the old model', you just might find yourself a bargain online.
Thoughts, comments, questions gladly welcomed as ever.
Another 'behind-the-scenes' video for you today, which was shot on the G9 at a recent assignment where I was asked to produce some simple portraits for a local directory company. As is often the case with small- to medium-sized 'local' businesses, my client on this occasion works out of a home office. Accordingly, this was a good, logical starting point for shooting the pictures.
I often like to work 'on-site' like this; with familiar surroundings, sitters are always relaxed and any props or information that might be required is always on-hand.
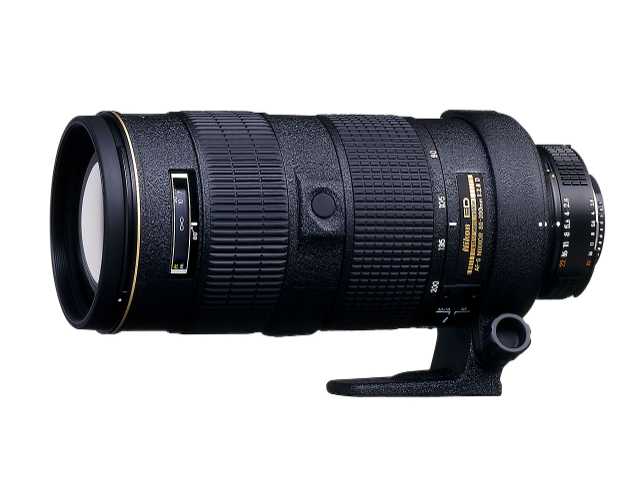
There really is not a lot to say about this shoot, actually, as it was very, very simple. One camera (Nikon D200), one lens (80-200mm f/2.8), one light (800-watt tungsten lamp, bounced off the white ceiling) and, for simplicity, the living room wall assumed the role of neutral background.
Here's the footage, more info below:
You'll notice that there was quite a lot of activity throughout the duration of the shoot. Given the flexibility of my schedule that particular week, and that of the client, this one took place on a Saturday morning - just when there was houseful of kids, friends and relatives! But that's ok, because (as is also often the case) the business plays a big part in family life - so it was nice to get everyone involved. The more the merrier!
There was very little post-production required on this set of pictures. The colour was balanced to reduce most of warm cast produced by the light (I left some warmth in, to boost skin tones), a standard amount of sharpening, and no cropping as we wanted to leave the images full-frame to allow plenty of flexibility for this when they were arranged, by the client, in the 'Editor's Letter' section in the publication.
Last month, I posted the introduction to an assignment I was asked to undertake recently. The premise was to illustrate 'the business brain', with an emphasis on telephonic communication. If you missed the intro (Part 1), you can check it out here.As for Part 2... keep reading to find out how our initial thoughts developed into the resulting image. OK, so having finalised the envisaged look of the picture, the next thing to do was make sure all the props were in place. As I said in Part 1, the 'brain' itself came courtesy of Ebay, but the question was - would it look right? How to decide.... hmm....? Obviously, we met up in a neutral place - in the car park of a local hotel on this occasion - to find out. Picture the scene then, as two cars roll up (under the watchful gaze of the hotel's surveillance cameras, no doubt)... Man 1 gets out of his car, greets Man 2 and partner, before producing brain out of a nondescript carrier bag and plonking it (technical term) on the rear of Man 2's car. Oh, how we would love to see the fuzzy grey camera footage from those few minutes - fame at last, eh John?!
Back at base, the only 'physical' things left to sort were the background and the spiral cabling which would be fixed directly onto the brain. The picture on the left here shows some early contenders - but none of them were quite right, and it was agreed that only a true 'spiral' cable (such as that found on telephones) would do. Sounds kinda obvious, but you have to try these things. As it happens, we actually decided to use the lead from an electric guitar, as this was nice and chunky (another technical term!) - an important factor to make sure it stood out in the picture.
With props sorted, then, it was time to think about the background. In order to create an infinity curve (a background with no 'horizon'), we went with a simple piece of A1 (24"x30" approx.) blue card which would offer a nice range of tones - from 'highlight' to shadow - dictated by the lighting. I already had this card to hand, and it turned out to be the perfect shade for our purposes. (I always keep a stock of backgrounds for small table-top arrangements such as these).
Now we're getting to the 'fun' bit - how to go about attaching the cable to the brain. In this picture, you can see the brain, cable, background card, wire cutters and... hair clips! Ironically, I have no other use for such items as hair clips (as colleagues testify all too regularly!), but these little pieces of metal did a great job of holding the cable in position. The process involved cutting off the rounded tips and pushing the clips into the foam-filled brain.
Here's a little 3-minute time-lapse video (shot on the G9, naturally) showing the somewhat labourious task:
Well done if you watched that all the way through - it really was that exciting in real life, too! But it's the result that counts so... you know...
Having put everything together, here is what the finished object looked like. Again, the G9 was used to take this quick snap to send off for approval (the picture also acted as a reference during the main shoot itself). Of course, the hair clips are clearly visible here; we got around this, ultimately, by using contrasty lighting and good old Photoshop to remove them at the post-production stage.
You'll also notice that the plugs are not shown in the picture. Nothing as drastic as cutting them off - they were simply cropped out of frame.
As for the lighting, we kept this really simple too. Ridiculously so, in fact - just one Nikon SB-800 mounted directly above the set-up on a Super Clamp, firing through a 2ft Bowens soft box (for a more diffused effect) and angled forward slightly. This gave a pleasing shadow underneath the brain, as well as a nicely graded fall-off effect on the background. Oh, and the flash was triggered wirelessly using a couple of Pocket Wizards. And yes, in answer to all you Strobist techies out there, I could just as easily have used the SU-4 function for this purpose.
Here's another time-lapse (somewhat more visually interesting, I hope!), showing how it all looked. Again, note the really simple arrangement - why complicate things?!
And the final result? Well, you've just seen the image itself (supplied in both colour and black & white), at the end of the video. As for the brochure - with text and bordering put in place, and a couple of final tweaks at the design studio, the final cover looked like this. Again, very simple, allowing the image and text to convey the message.
There is often a great misconception that 'studio' shots require grand set-ups, excessive lighting and high production costs. While this may be the case with larger projects, it does not have to be the case a lot of the time. Sure, on this outing the shoot location may not be the most glamorous - but so what? It is, after all, the resulting images that count. You'd be amazed how many 'high profile' assignments for large companies and corporates are actually shot in less-than-thrilling surroundings - but again, who's to know? And working on-site with our clients, using improvised studios, is a great way to get to know the way their businesses work, too. If you have any thoughts or questions relating to this post, the shoot, technicalities or the way we work in various 'studio' arrangements, please feel free to air them in the comments section by clicking on the link below. Remember, it's all about sharing information and spreading the word - so it'd be great to get some discussion going!
Oh, and for more behind-the-scenes GBP videos, check out us out on YouTube.
One of my favourite types of location to photograph in is a factory or warehouse. There's just something about the lighting that really lends itself to potentially atmospheric images; I love the softness of their overhead illumination, and by working simply with the available light we can get a real sense of the subject matter in its simplicity. One of my assignments this week was in just such a place.
On arriving at the warehouse, however, the conditions appeared less than favourable - a very dimly lit building with no windows, and what light there was fell to the ground in patches. First up, then, we had to stop and re-think how best to illustrate the primary elements we were trying to get across given these conditions - specifically, the overall space, capacity, professional methodology and organisation of the client. Thankfully, there was a saving grace in the form of the key subject matter itself - bright yellow storage boxes - so we ditched the idea of using our SB-800 flashes in favour of the ambient light. Exposures, therefore, were in the region of 1-4 seconds - and for this we brought out the tripod and grip equipment.
This picture, shot on the G9, gives a good indication of the working conditions. Dark corners at the ends of the shelving, ranging through to highlight areas nearer the roof. This particular 'scene' was actually one of the brighter areas. Incidentally, all ground-level static shots were taken with a tripod-mounted Nikon D200 at ISO 100. Lens choice varied between the Sigma 10-20mm f/4-5.6 EX DC HSM ultrawide and the Nikon 18-70mm f/3.5-4.5 AFS IF-ED DX Nikkor.
Ground-level stuff is all very well but, you know, sometimes you just need something extra... And that's where the crane came in, taking me up to a height of aroun 26 metres - near enough to the very top of the building.Still working with the available light, I switched from the tripod to a Super Clamp/Magic Arm combo, which was attached to the basket of the crane. Given that there was no cross-wind(!) and that I was able to stand perfectly still, this arrangement was perfectly adequate for getting sharpe, blur-free pictures.It even did a great job at supporting the Nikon 80-200mm f/2.8 AFS telephoto, which was used for isolating staff from their surroundings.
With any shoot like this, what we are trying to produce is a varied set of images which informs would-be customers not just about the product, but about the process, too. Multiple tools such as clamps, lenses and lighting enable us to do this. Accordingly, we shot a number of supporting photographs showing specific details of the filing system as well as portraits of other members of staff carrying out their specific roles within the operation.
Right then... This is the first video we have produced for the GBP Blog, so please be gentle! As always we're looking to add more and more interesting content here, so do give feedback about what you see... and, of course, tell us what you'd like to see in the future, too.
This video is, quite simply, an illustration of how a shoot can be arranged in any loction, fitting in with the client's working day. The resulting images were to be used in a marketing campaign, both on large vehicles and printed matter.
People often ask us what is involved when setting up a shoot - for example should they come to a studio?/what should they wear?/how long will it take?/how many people will be present? In this instance, our 'studio' was an on-site cafeteria - which we took over for a few hours. Our subjects (7 in total, although only 2 appear in this time-lapse video) were actively on call, so we just grabbed them when the opportunity arose - this actually worked very well, as it often does, and we were only kept waiting for a few short minutes between sitters.
As for the technical stuff - we shot on the usual Nikon cameras, directly hooked up to a Mac. Okay, I admit it, I'm not a Mac user... and that's why you'll see Matt pressing all the buttons on this occasion whilst I take care of the light and, well, simply point at the computer :-)
It's always nice to preview images on a larger screen, as they appear, but in this case it was especially important as the lighting arrangement was very specific and had to be tweaked until it was just right. Speaking of which, 3 Nikon SB-800 speedlights were used, triggered remotely using Pocket Wizards. Naturally, the video was shot on the trusty G9. Be sure to watch out for the photographs at the end! Enough talking... on with the show:
Oh, and one last thing - a big 'thank you' to Paul for the backing music. Seriously, you really brought this first video together for us!
For more behind-the-scenes GBP videos, check out us out on YouTube.
For some time now, I have been on the look-out for a take-anywhere point-and-shoot camera; something that can be easily slipped into a pocket or rucksack instead of having to lug around a heavier SLR camera just for the sake of a few grab shots.
This is by no means a technical review - just a few initial thoughts and reasonings.
I never did find a camera to fit the bill. Looking at the market, some models offered a nice compact size, but not the spec. Others went the other way, providing more functionality, but at the cost of being physically larger. Trouble is, I wanted something in between - a camera which would allow me to take complete control, at the same time not making me feel as though I may as well have just grabbed an SLR and be done with it. Thankfully (and finally), it appears that the gap has now been filled. Having heard many good things about Canon's Powershot G9, and having seen some very impressive images produced by it, I took the plunge and am pleased to say that it is now safely lodged as the latest piece of kit to find its way into the GBP arsenal. And from our own initial tests, the results are quite simply incredible.
OK, so we've established the first requirements - quality, funtionality and compactness. The G9 ticks all boxes - it has a 12.1MP sensor, the ability to capture in RAW, complete manual override and connectivity for remote flash operation. It even has a manual focus option - quite unusual for compact cameras, but always well worth having!
The autofocusing itself is fast and exposure metering is incredibly accurate - both working well throughout the full range of the 7.4 - 44.4 mm lens (that's about 35-210mm in 35mm terms). Even shooting right into the sun, the focus doesn't hunt around, instead locking quickly onto the subject, and in low light situations, Canon's Image Stabilisation is a great asset (especially when employing the Macro setting).
Using the G9 almost feels like working with a rangfinder camera (think Leica) in terms of how quickly everything comes to hand and the fact that an optical viewfinder is incorporated (something of a rarity for compacts these days). In truth, I expect this o.v. will receive less attention due to the wonderfully crisp and bright 3" screen on the back. Much as I love the traditional, why would you squint when you don't have to?
Now, I've never been a fan of all the audio add-ons you get with cameras and technology. You know the sort of thing - "Beep! You've turned on the camera. Beep! Welcome to the start-up screen. Beep! Focusing. Beep! Ka-chink! Picture taken. Beep! Image review..." Therefore, my first thought is always to turn off all of these sounds whenever possible. Doing this on the G9 is easy enough and means that operation is virtually silent - ideal for candid photography or when you want to keep a low profile.
The second requirements of a camera were aimed specifically at our web-based activities - i.e. the GBP Blog and website. We will be incorporating extended video content from now on, so if you have any questions about the way we work, what kit we use, how a shoot is co-ordinated etc, just enter your thoughts/comments/questions below and we will address them in future posts.
But getting back to the G9...
As well as capturing high-quality still pictures, the G9 also has the ability to record movies in 640x480 resolution at 30 frames per second - ideal for blogs and podcasts. It was initially a toss-up as to whether we went for a dedicated video camera or sought out a hybrid stills/video unit. Afer all, for our purposes, we weren't looking for High Definition, broadcast-quality footage - just good quality images and clear audio recording.
We've already done a few tests, including time-lapse recording - and again, the results are very promising. Contrast is handled supremely well and focus stays constantly on the ball, even with considerable variation in lighting such as turning lights on/off in quick succession. And in darkened environments, footage remains clear.
So, am I going to be trading in my SLR cameras now that I have the new Canon? Clearly not. But such is the power of the G9 that I will be taking it along as a back-up on shoots, just in case my SLRs fail. Having said that, the quality, user-control and connectivity is all there, and so it would not be an exaggeration to consider doing quick location shoots solely using this little camera and a couple of Speedlights.
Full-time professional photographer, writer, outdoor type, gladly embracing all manner of technologies, old and new, in the pursuit of greater things.
As for this blog... Communication is good - I like communication. I'm always interested to hear what you have to say, so please feel free to post your thoughts, musings, comments or questions in response to my own ramblings :)
All content in this Blog - both words and pictures - is protected by Copyright laws and may not be reproduced without my permission. Please respect these laws (it's better for all of us in the long run!). If you would like to use anything you see here, just get in touch and I'll see what we can do.
Of course, if you would like to link back to stuff in this blog, then go right ahead!

.jpg)




 Posts
Posts